The Peaka Web Data Connector imports tables from your Peaka project into Tableau extracts. This guide covers installation, API key setup, table selection and import.
You will:
- Generate a Peaka API key.
- Install the Peaka connector file.
- Start Tableau and connect to your project.
- Select and import your tables.
Before you begin
Use Tableau Desktop 2023.3 or later with Web Data Connector 3.0 enabled. Tableau has retired WDC 3.0 and disables it in some recent releases. If your organization has disabled WDC, contact your Tableau administrator or use the Peaka JDBC connector. See Tableau's WDC notice for version guidance.
Have a Peaka project with connections and catalogs ready, and make sure Tableau can reach your Peaka installation over HTTPS. For an on-prem installation, ask your administrator for the external Peaka Partner API address.
Generate a Peaka API key
Follow How to generate API keys. The key needs access to your project, permission to read its metadata and permission to execute the queries used to import your tables.
You can use either:
- A project API key: the connector finds its project automatically.
- A partner/organization API key: enter the target Project ID when connecting.
You can find it in your Studio project URL:
/studio/<PROJECT_ID>/....
Install the connector file
A TACO file is a packaged Tableau connector. Download PeakaWebDataConnector-1.0.3.taco and SHA256SUMS.txt from GitHub. Check the downloaded file against its SHA-256 checksum.
Quit Tableau and place the TACO file in the connector folder for your application. Create the folder if it does not exist, and move older Peaka WDC versions out of it.
| Application | Windows | macOS / Linux |
|---|---|---|
| Tableau Desktop | %USERPROFILE%\Documents\My Tableau Repository\Connectors | macOS: ~/Documents/My Tableau Repository/Connectors |
| Tableau Prep Builder | %USERPROFILE%\Documents\My Tableau Prep Repository\Connectors | macOS: ~/Documents/My Tableau Prep Repository/Connectors |
| Tableau Server | C:\Program Files\Tableau\Connectors | Linux: /opt/tableau/connectors |
The steps below use Desktop. For Prep or Server, have your Tableau administrator confirm WDC availability and configure the connector for that application. See Tableau's connector installation guide.
The source code and release notes are available on GitHub.
Start Tableau with the connector
The current download is unsigned. Close Tableau completely before starting it with the following command. Disabling connector signature verification applies to this launch only; follow your organization's policy for unsigned connectors.
macOS
Open Terminal and run the command below, replacing the application path with your installed Tableau version:
open -a "/Applications/Tableau Desktop (Apple silicon) 2026.3.app" --args -DDisableVerifyConnectorPluginSignature=trueTo save a reusable launcher, create a text file named tableau.sh with the following
content, adjusting the path to match your installation:
#!/bin/sh
"/Applications/Tableau Desktop (Apple silicon) 2026.3.app/Contents/MacOS/Tableau" -DDisableVerifyConnectorPluginSignature=true
In the folder where you saved the file, run:
chmod +x tableau.sh
./tableau.sh
Windows
Open Command Prompt and run the command below, adjusting the Tableau version:
"C:\Program Files\Tableau\Tableau 2026.3\bin\tableau.exe" -DDisableVerifyConnectorPluginSignature=trueThis launch option lets Tableau load the unsigned package. Your Tableau installation must also have WDC 3.0 enabled.
Connect to your Peaka project
In Tableau, choose Connect → To a Server → More, then select Peaka Web Data Connector by Peaka.

Fill in the connection form:
| Field | What to enter |
|---|---|
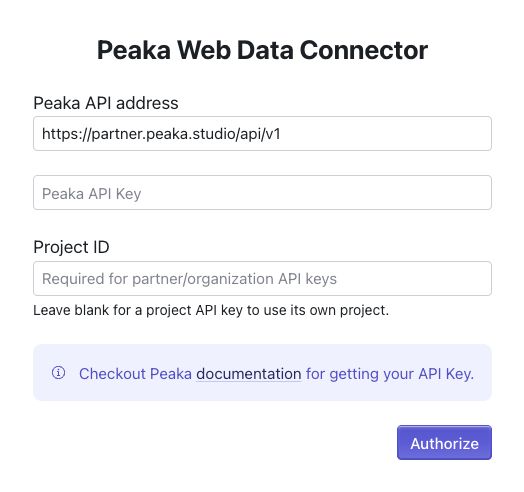
| Peaka API address | For Peaka Cloud, keep https://partner.peaka.studio/api/v1. For on-prem, enter the HTTPS Partner API address supplied by your administrator, including a port if required. |
| Peaka API Key | Paste your API key. |
| Project ID | Required for a partner/organization key. Leave blank for a project key to use its own project. |
Enter only your intended Peaka installation's address: the API key will be sent there. Use the Partner API address, which is separate from the Studio website and JDBC server. The same connector package works with Peaka Cloud and on-prem installations.
Click Authorize to open the table selection screen.
Select the tables to import
- Choose a catalog and schema to list the available tables.
- Choose Full Scan to import the whole table, or Limit and a row count for a smaller import.
- Click Export beside each table you want to add. Wait for it to appear under Selected Tables.
- Use Remove to take a table out of the selection.
- When the selected tables are correct, click Next.
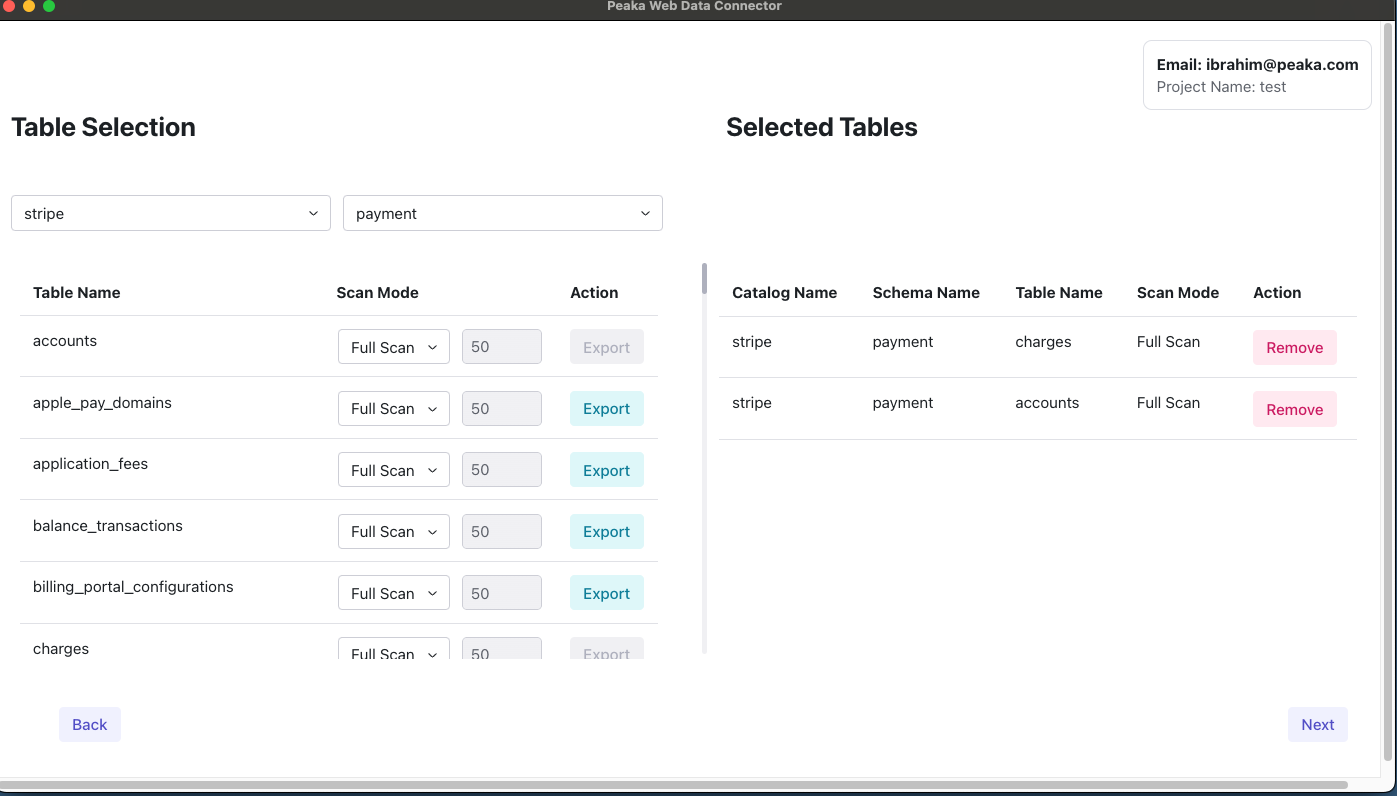
Use Back to change your connection details. Changing the Peaka address, API key or project clears the previous table selection.
Review and finish the import
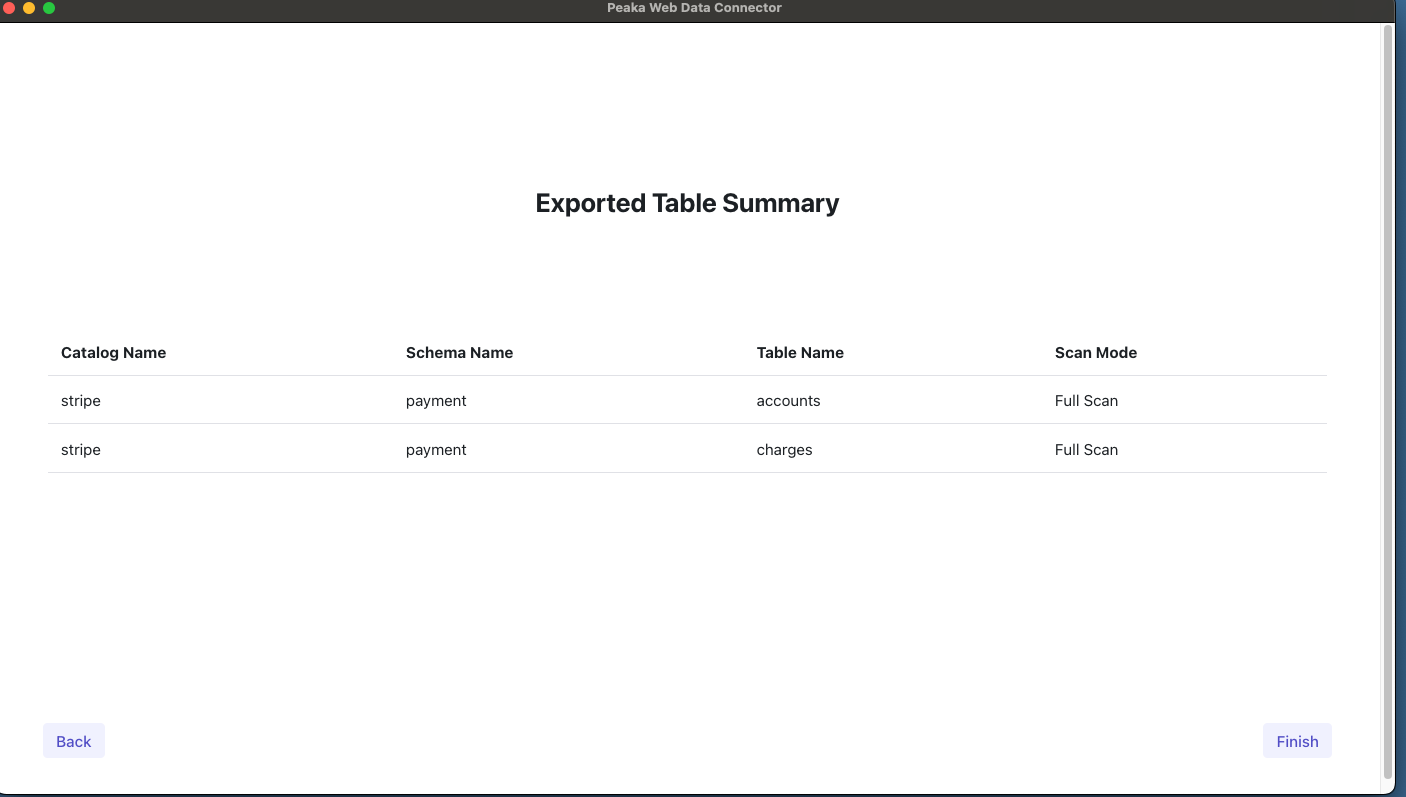
Review the catalog, schema, table name and scan mode on Exported Table Summary. Use Back if you need to change the selection. Otherwise, click Finish and wait for Tableau to import the data.
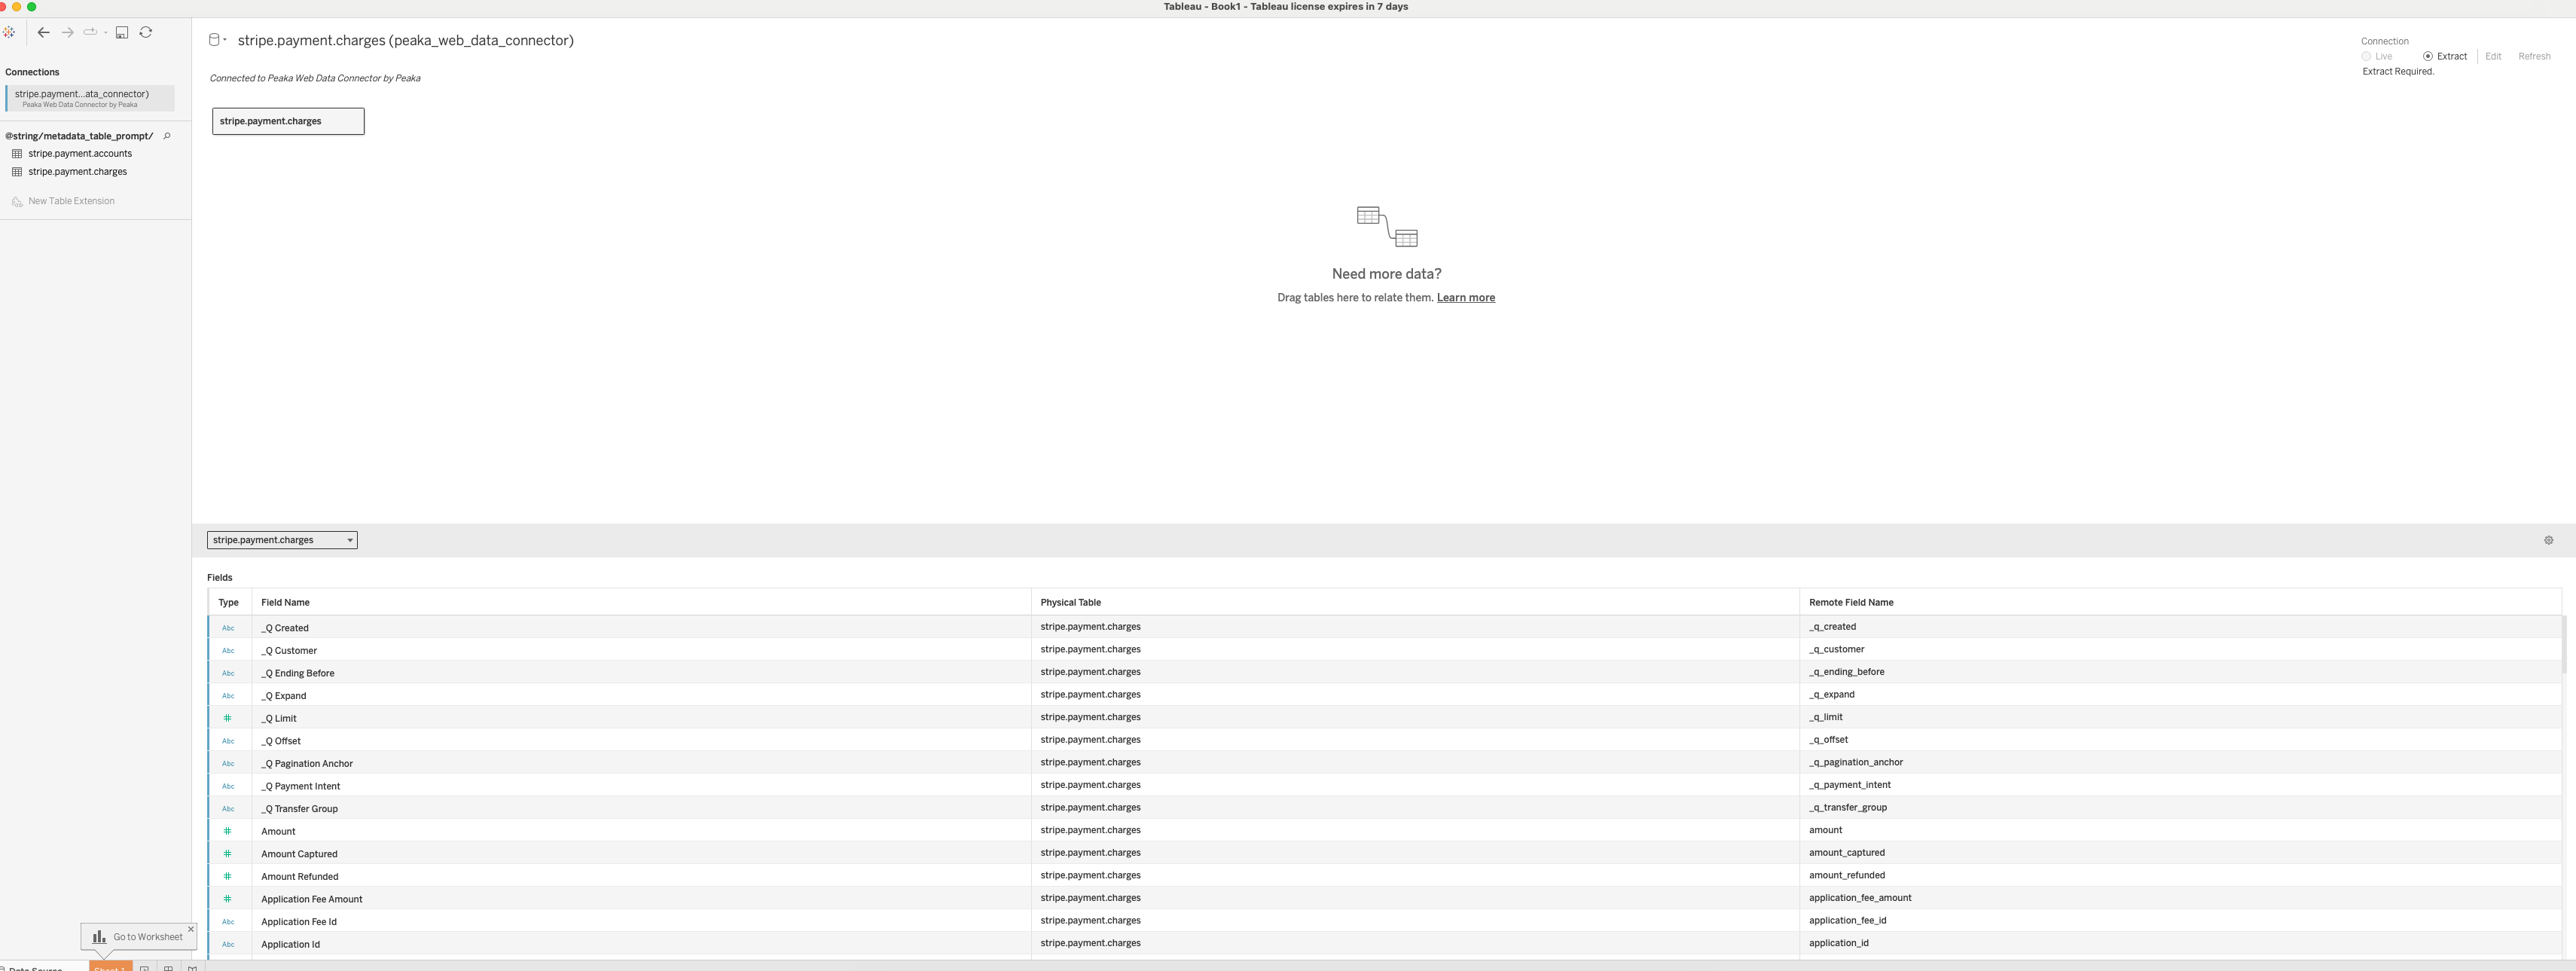
After the import completes, the tables appear on Tableau's Data Source page. Select a table to review its fields, then open a worksheet to begin your analysis. WDC imports data as an extract.